
Setting up your LP230
Please follow steps 1 through 10 to configure your printer.
Step 1. Place the printer on a flat surface and make sure the power switch is turned off.
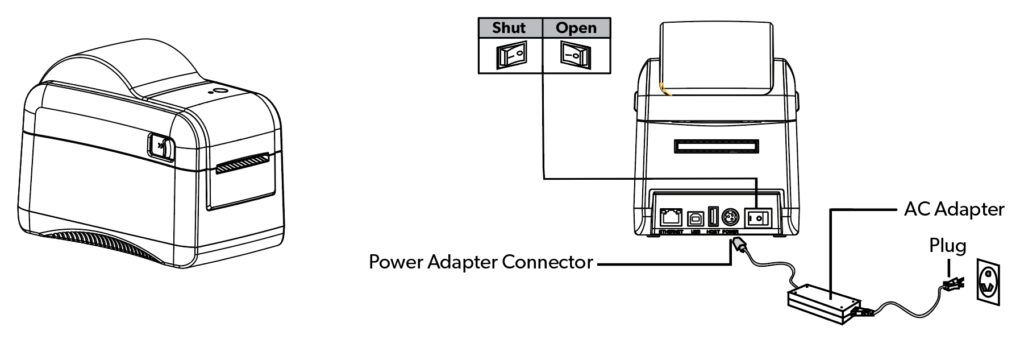
Step 2. Plug in the USB Cable/Ethernet Cable and Power Cable to the ports on the back of the printer plug the other end into the computer host/network and power source. Switch on the printer power.
Step 3. Download and install the printer driver
Step 4. Place the roll of labels on the spindle into the printer. Place the spindle in the mounting area.
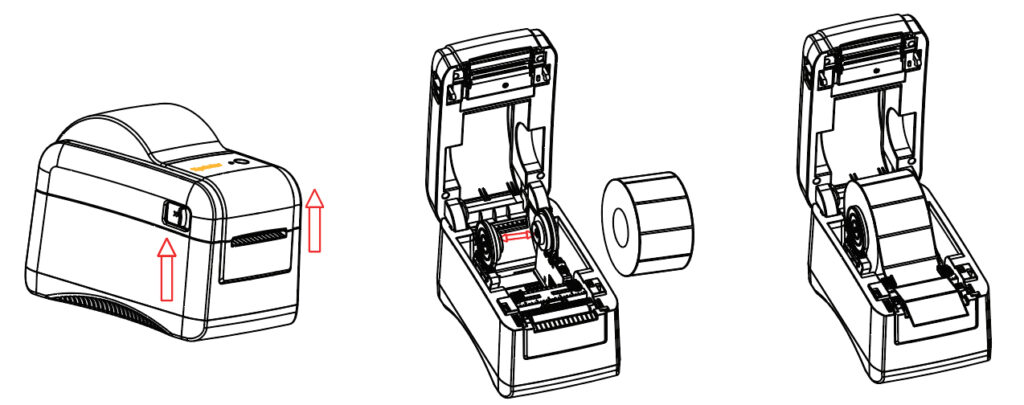
Step 5. Feed the labels, printing side face up, through the label guides and adjust the label guides in or out so they are slightly touch the edges of the label backing.
Step 6. Close the printer lid.
Step 7. Power on Printer.
Step 8. Plug in the USB and AC adapter for the printer.
Step 9. Install the Printer Driver following the onscreen instructions
PLEASE NOTE: Make sure to select USB and Network as the port type when selecting a port.
Step 10. Download AmbirLabel from the link below and follow the on-screen instructions to install. You can also use the LP230 with any third-party printing application by selecting “Ambir LP230″ as your printer.”