Please follow steps 1 through 10 to configure your printer.
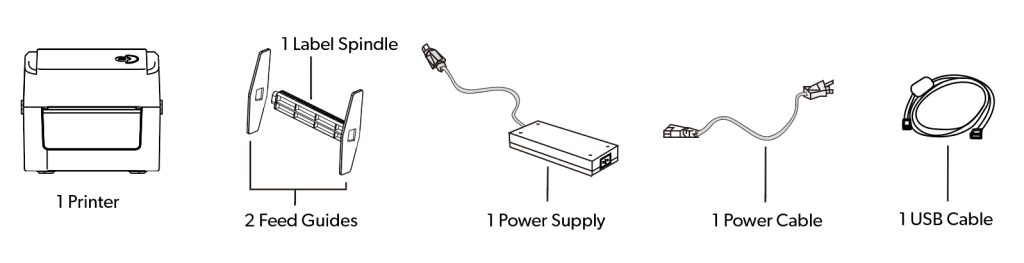
Step 1. Open Box and Check Contents of Package. PLEASE NOTE: Thermal Labels Not Included.
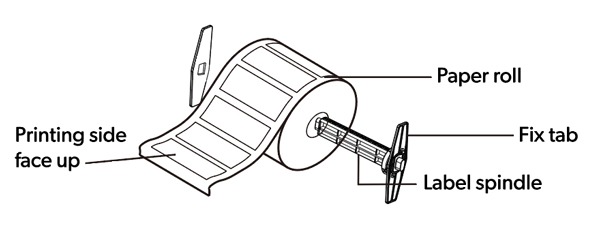
Step 2. Assemble the spindle roll and place a label roll on to it with the labels face up.
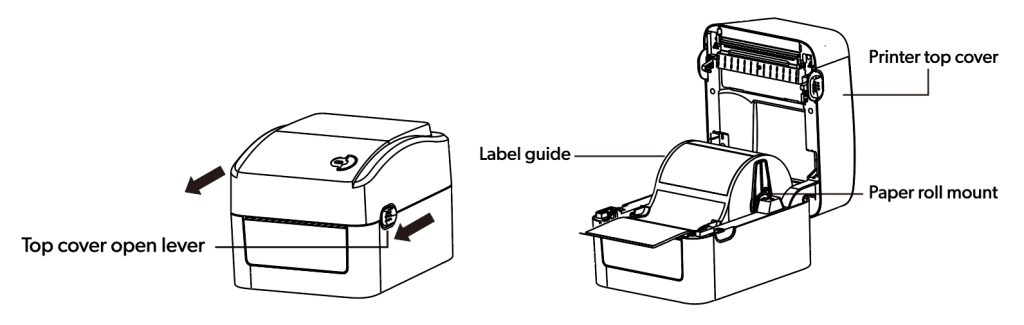
Step 3. Open the printer cover by pushing the grey buttons on both sides of the printer forward.
Step 4. Place the roll of labels on the spindle into the printer. Place the spindle in the mounting area.
Step 5. Feed the labels, printing side face up, through the label guides and adjust the label guides in or out so they are slightly touch the edges of the label backing.
Step 6. Close the printer lid.
Step 7. Power on Printer.
Step 8. Plug in the USB and AC adapter for the printer.
Step 9. Install the Printer Driver following the onscreen instructions