Step 5. Click on the AmbirScan Icon on your desktop.
Navigate to the Settings Tab on the side menu.
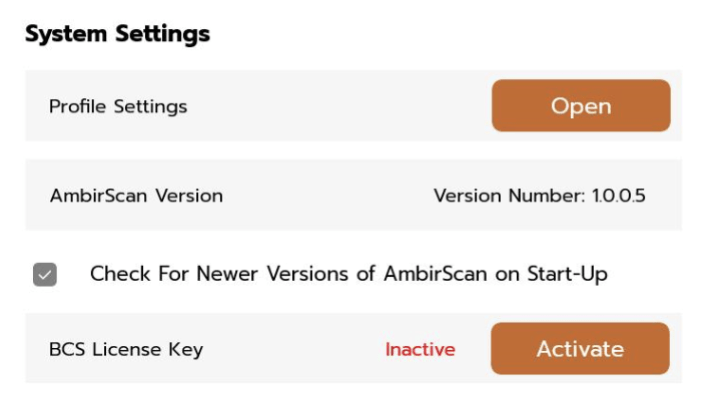
On the Canvas in the second column you will see the BCS (Business Card Scan) License Key. See image below.
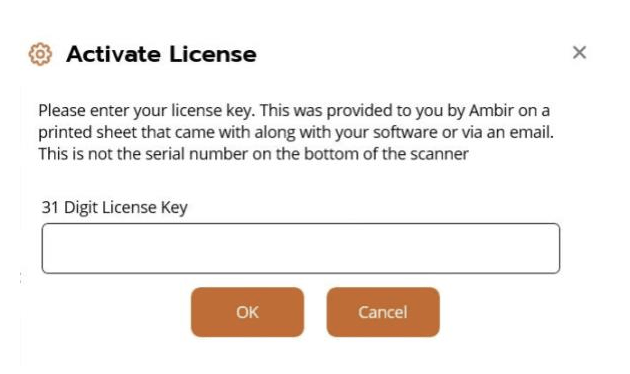
Step 6. Enter license key on insert with the scanner or with that came via email.
Click Activate to open the pop up. This is where you will enter you 31-character long key.
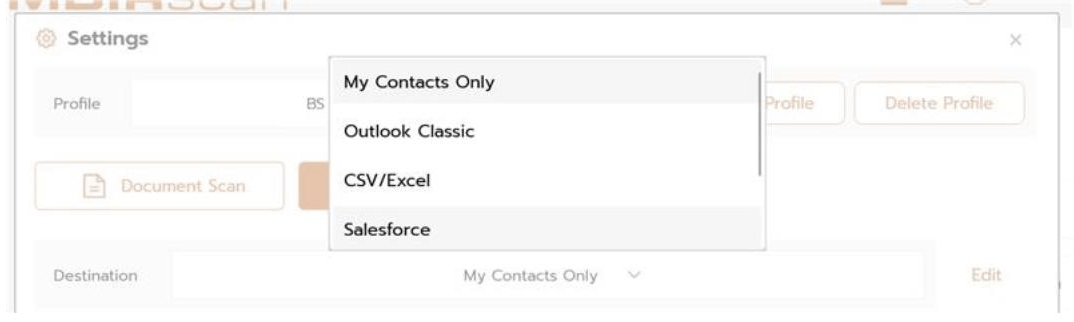
Step 7. Select your contact destination in the dropdown.
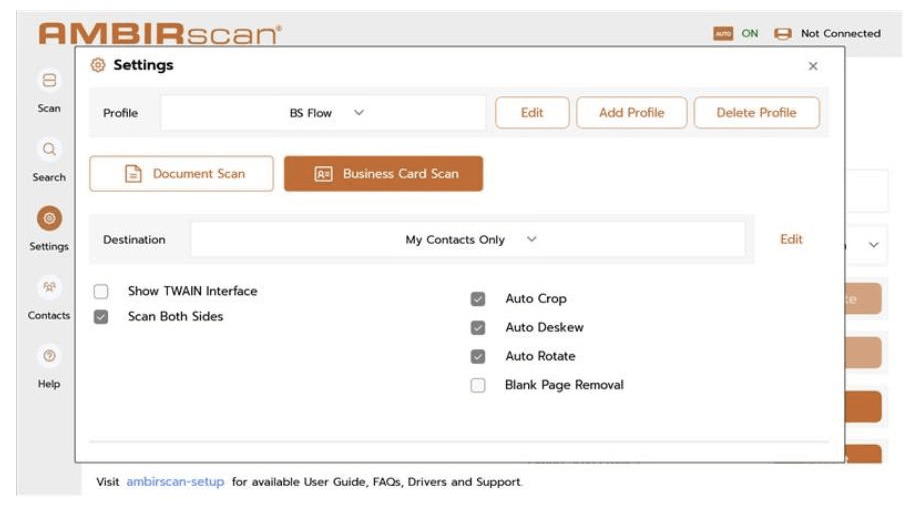
Return to the to the settings page and select the business settings to create a profile.
First click the Business card Scan Button.
Then make the changes in the settings you wish to see in your scan profiles. (see image below)
Next select a destination for your scans.
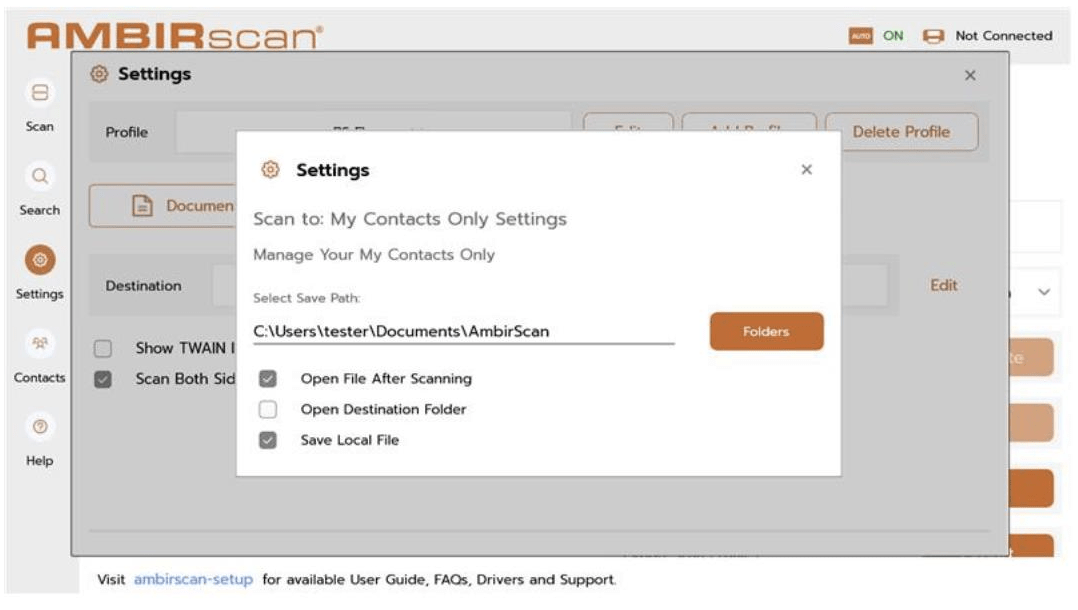
Once you have selected a destination, Click the edit button next to the dropdown menu.
Depending on the Destination you may need to configure your account. Follow the instructions provided.
Afterwards Save your settings and return to the scan page.
Step 8. Start Scanning Business Cards.
On the scan page click the Scan profile dropdown menu.
Select the profile you created for BCS (Business Card Scanning)
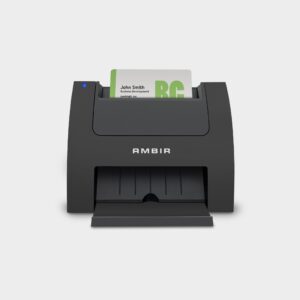
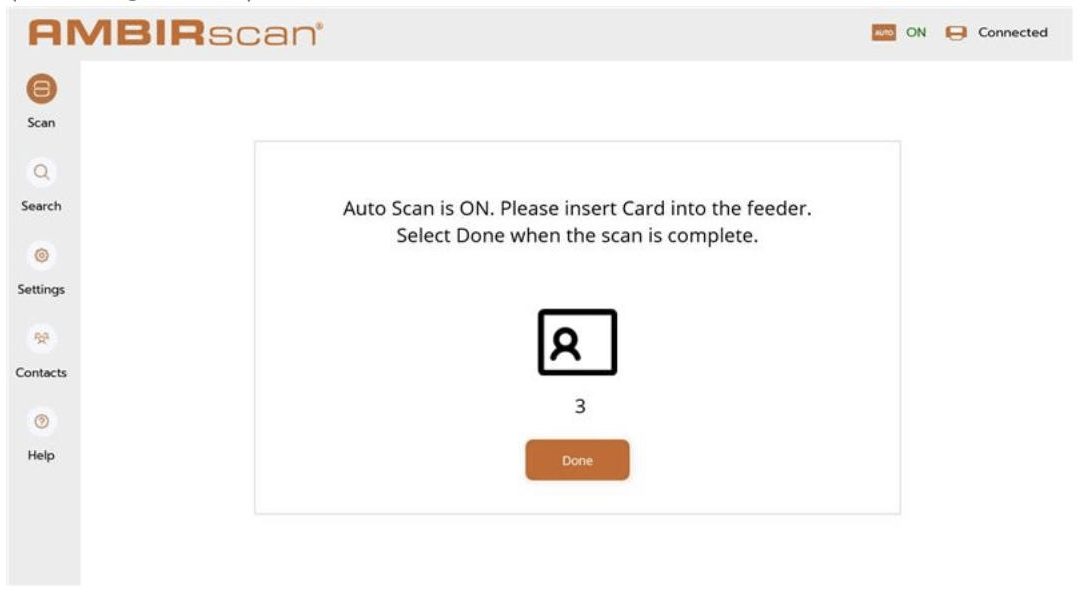
Then Enter the card feed the card into the scanner. If auto scan is active you may enter as many cards as you need.
Once you have the number of cards that you need, Click done.
(see image below)
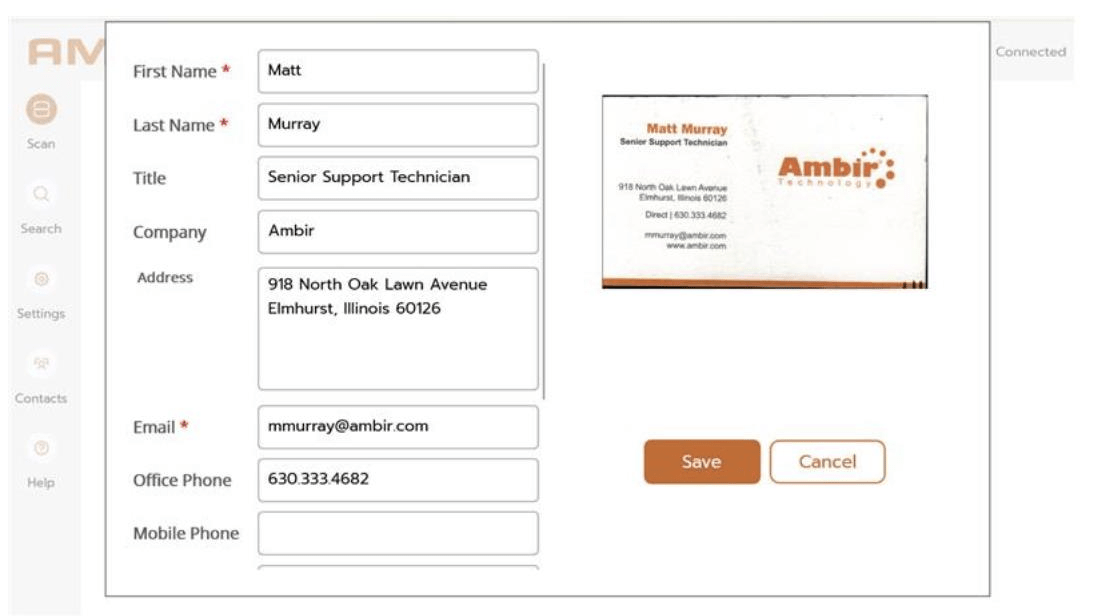
Step 9. Post scanning edit flow.
Clicking done will open the card information pop up. In this view you can see the preview of the card, and make any edits information on the text fields in the left side of the screen.
Note that the First Name, Last Name. and Email sections are required in order to move forward.
One all edits look fine, click save and your scans will save to the destinations assigned to the profile settings.
Step 10. Scan Process Complete.
Scan Process Complete.You have now successfully activated, and completed the BCS Flow.
Repeat any of the previous steps for other scans and profiles.